All about | Regional Varieties | Storage | How to | Recipes
All about
Vanilla. Simple. Fragrant. Earthy. Fruity. Romantic…… I’m amazed. Is there anything that doesn’t have a Vanilla version? The simplest, most basic flavours: cakes, Ice-creams, yoghurts, cookies…… they all have Vanilla as standard and what a great precedent it is for the rest of the world of flavours. I love you Vanilla.
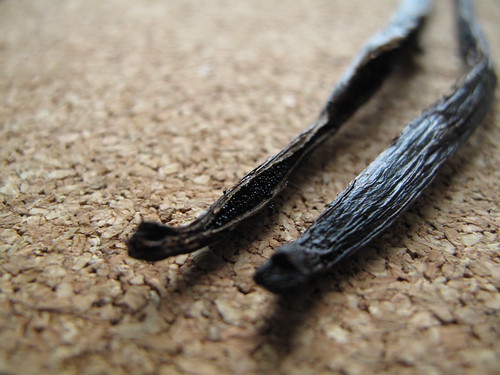
This bean/pod that is both an aromatic and a spice. Aromatic… because of its ability to fragare (Latin meaning to smell). Spice because in addition to its perfume, its addition to a recipe imparts a delicate but welcome flavour. Think of the very best Vanilla ice-cream you’ve had, speckled with tiny brown-black seeds or sink your teeth into that creamy sponge cake, and inhale its scent, taste its sweet flavour…. Are you there yet?
- It derives its name from the word, vaina which means pod
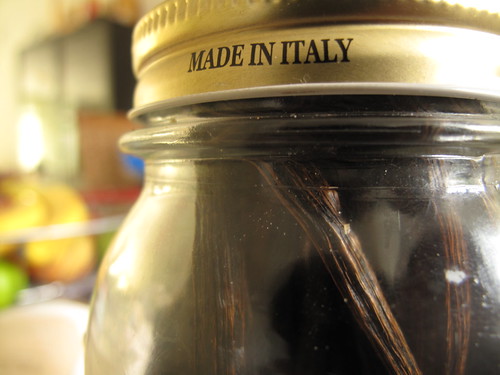
- This very expensive bean is the dried and cured fruit from the Vanilla orchid plant native to Mexico. It is the only orchid that bears fruit!
- It is up there, right next to Saffron in the fact that it is labour intensive and the second most expensive spice in the world. Last week I bought a Vanilla bean weighing 1.5g for €1.25. So if I consider the cost per kilogram…. I arrive at about €833 per kilogram!
- Vanilla is cultivated, pollinated and harvested manually – no equipment, no fertilizers, nothing.
- Vanilla goes through many processing steps which include steaming and alternate dry-wet processes over 3 or 4 months – this results in the characteristic dark, glossy pod with a heady scent!
- Most of the regions where it is cultivated are tropical: Madagascar, Indonesia, Tahiti,Papua New Guinea and India, to name but a few.
This bean/pod has gone from being something for the royals to being flavouring for the masses – a transition for which I am mighty glad.
And to think my love for the fresh pod (not extract) is fairly recent, starting only three years ago…. ever since I bought my first pod in a test tube. I was still living in Nigeria and had come to the Netherlands on business. Back home, I used that Vanilla with great care and caution in a pannacotta, which I still remember with great fondness.
3 years later and now living in the Netherlands, I started buying Vanilla beans from my local supermarket till I read a discourse on Vanilla at C&Z, which had me scurrying to one of the talked-about online stores, Amadeus to order a sampler of 4 different varieties (with 8 beans i.e. 32 beans)
The beans cost me in US terms, $35 (including a $7 base UPS ground charge). Because I was outside the US and wanted them sent to me, I had to pay an extra $17 charge, bringing my expenses to a grand total of $52 the equivalent of €40.
I was completely bowled over when the Vanilla arrived a week or so after I placed the order. The glossy, plump brown pods were bubble-wrapped and delivered in a fairly large box and the fragrance – wow. Warm, heady, earthy, tropical……I was excited beyond words. Just holding a pod in my hands and feeling the thickness made me feel it was worth it, even if it worked out more expensive…. but it didn’t. I had to do a comparison between my local and what I got online.
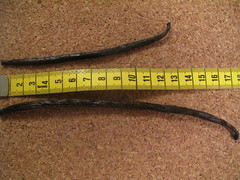
| Local | Online | |
| Cost (€) | 1.25 | 1.7 |
| Weight (g) | 1.5 | 3 – 4 |
| Length (cm) | 13 | 17.5 |
| Circumference (cm) | 1 | 1.7 |
So, the beans I bought online were more expensive by about €0.45 but they were twice as heavy and since the pods are sold by weight in the shops, then it should have cost me €2.50, solely based on weight.
If I add the fact that the beans from my local are roughly 3/4s the length of my online buy, I’ll add about €0.40 to the €2.50 – bringing the ‘total’ equivalent cost of my beans to about €2.90. And yet I only paid €1.70, effectively saving about €1.20 on each bean!

So now that I’m done letting you know how good a deal I got on my Vanilla beans, I can go into the nitty gritty of using them and all the rest.
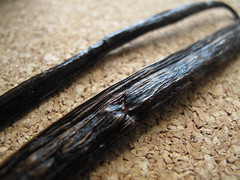
My sampler pack included Madagascar Bourbon beans, Papua New Guinea, Tahitensis and beans from Indonesia. Each region produces beans with distinctive and peculiar characteristics. The most popular varieties (with Vanilla flavouring ability) are Bourbon and Tahitensis (from different regions, different plant varieties and with different flavours).
Bourbon Vanilla beans come from Madagascar, an island off the east coast of Africa. Madagascar is the world’s largest producer of beans from the Vanilla planifolia plant producing what is known as Bourbon Vanilla – the caviar of Vanilla. The term Bourbon also covers beans grown on the other Bourbon Islands – Comoro, Seychelle and Reunion. The flavour is described as creamy, sweet, smooth and mellow and is the result of vanillin, which gives the beans its distinctive Vanilla flavor. Some Vanilla beans are so full of vanillin that it crystallizes out to the surface of the Vanilla bean…. good news.
Tahitian Vanilla beans come from a different genus of the Vanilla orchid – Vanilla tahitensis from the tropical island of Tahiti. It has a fruit, flowery fragrance and is not very rich in vanillin. However, it is high in anisyl compounds which result in its fragrance and fruity flavour. The beans are somewhat expensive and are referred to as Tahitensis beans.
The first thing you ought to know is how to store your Vanilla beans – not in the fridge or freezer – cold dries them out and may promote a particular type of Vanilla mold! I keep mine in a small closed container in my kitchen cupboard (aka cool, dry and dark). The experts recommend opening the container every couple of weeks or so to let the air circulate a bit and for you to be hit by the earthy fragrance of Vanilla. If they are vacuum packed them leave them as they are till you’re ready to use them.
The beans last a while…. I’ve had mine since October last year and they are still as fresh as the day I got them.
I also got a second batch of ‘extract quality Vanilla beans’ in December when my sis from the States was coming over – I didn’t have to pay the extra international postage fees too. Anyway, in the rush to get ready for Christmas ‘08 which seemed to happen upon me, I forgot to put this batch in a container, leaving them in the bags they came in. Two months later, a very tearful me discovered the error of my ways when I saw extremely dried out pods. I rushed to revive them and thankfully I could. All I had to do was peel a potato, halve it and place it in container with a lid. Then I put the Vanilla beans in, covered the container and kept it in a dark place. After a week, the beans had regained some of their moisture. By this time, the potato had changed colour and texture and out it went. I wasn’t satisfied though that the beans had regained full consciousness and so I put in another fresh potato half and that rescued and restored the beans. Be warned – store your beans properly.
Alternatively, you could also soften dried out pods/beans by putting them in warm milk or water before you use them.
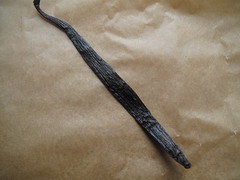
Opening the pod up
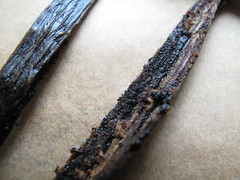
To use the Vanilla bean, you’ll need some wax/parchment paper (if you use a chopping board, some seeds get lost in the board’s grooves because they are sticky, using wax/parchment paper deals effectively with this, they also tend to stick to your hands too) and a pair of kitchen scissors or a knife with a pointed tip. Lay your Vanilla on the wax paper and cut in half, lengthways to open up the pods. If the beans are dry and hard to cut through, consider softening them by steaming for a couple of minutes or place them in a sieve over boiling water, then cool it slightly. This should solve the problem. I also to flatten the pods by pressing them so I can get a good grip to slice it open.
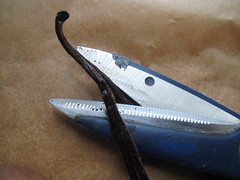
Scraping out the seeds
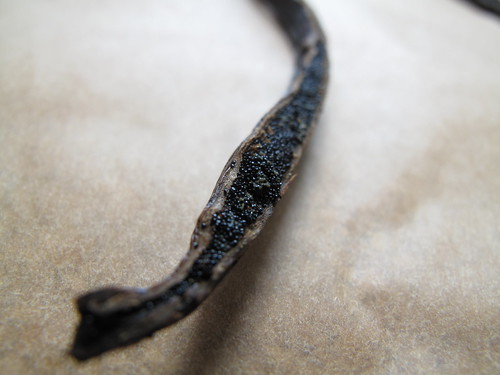
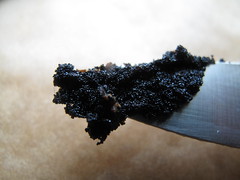
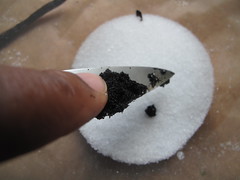
Once you’ve succeeded in opening up the Vanilla pod, it is time to scrape out the seeds. This is best done using a knife with a smooth edge. Starting at the top of the pod, scrape the inside of the pod downwards and with light pressure. The aim is to remove as many of the seeds as possible. The seeds will all clump together in a sort of moist embrace with one another. Don’t worry about separating them, this is how you need them to be. When you’re done with the wax paper, fold it and keep it away for next time – just a little green tip.
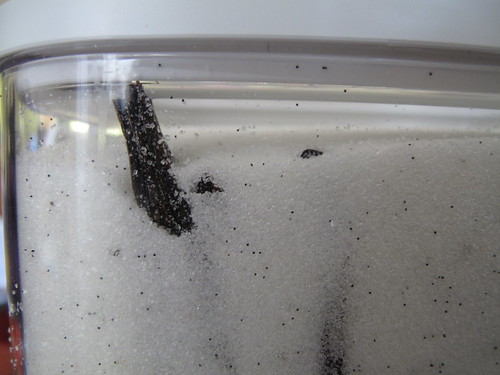
The seeds remind me of caviar….. their browny-black luster and they way they stick together. And that’s it….. don’t throw away the pod though, it still has life in it. So use the seeds as you will and keep the pods for scenting your sugar, salt, cereal and for making your own vanilla oil, vinegar and extract…. Is there no end to what you can do with this pods?
To make any Vanilla condiment, you have two options: use the pods only or use both pods and seeds. Note that if you use just the pods, the effects may take a while longer to manifest… but they will eventually. Truth be told too, just scraping out the seeds will take out the bulk of them but won’t completely render them seedless so the pods aren’t exactly seedless. Below are a few recipes for making some condiments.
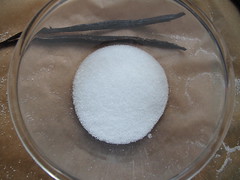
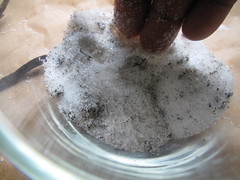
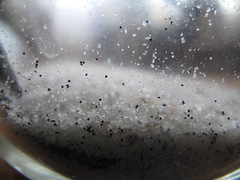
Vanilla sugar: Basically, when I make Vanilla sugar – and that’s our standard home sugar (fine crystal) – not just for special occasions but our everyday cup-of-tea sugar, I literally plunk in my almost seedless pods into a bowl with the sugar and then I run my fingers through it all to tease out the last of the seeds and then I put it back into our sugar jar and that’s it. For real topnotch, gourmet style vanilla sugar, grind the dried pods and sugar in a spice blender/grinder. Store in an airtight container.
Sometimes though, I want to bake something with superfine sugar crystals. On those occasions, I get the seeds out of ½ a pod and mix them with about 125g – 180g of sugar. Then the pods go somewhere else, again. And even other times, I make brown vanilla sugar…. and that is just heavenly. Truly heavenly.
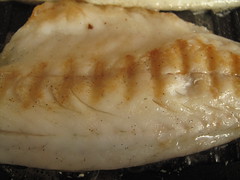
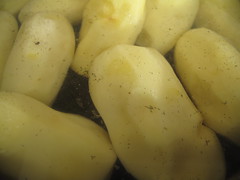
Vanilla salt: The exact same procedure goes for Vanilla salt.
which is delicious on pan fried fish, ended up lightly scented. I’ve even tried it in potatoes, with no perceptible difference I must add!
Vanilla in my Muesli: When I want Vanilla scented and flavoured Muesli, I scatter in the seeds, gently mix in and then stick the used pod in the cereal jar as well.
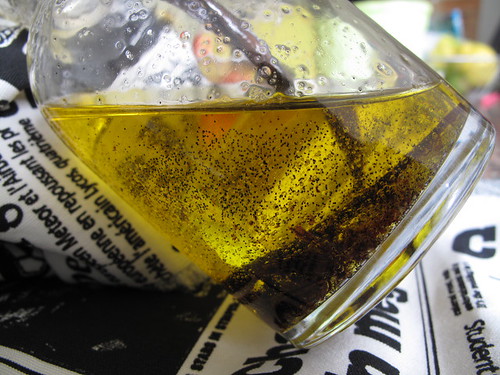
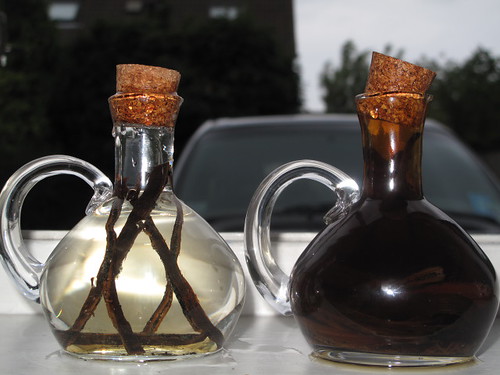
Vanilla oil: I pop a vanilla pod, seeds and all in a bottle of Extra virgin olive oil. Then I shake it around and then leave it in my store cupboard for about a month. Fantastic on ice-cream…. gelato con sale e olie
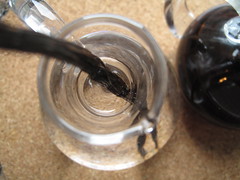
Vanilla vinegar: In a bottle, I put some white wine vinegar and to it I add a split vanilla bean/pod and then I add some leftover blackcurrant seeds/puree to make a delicious vanilla flavoured fruit vinegar. This I store in the refigerator because the addition of the blackcurrant and all its moisture dilutes some of the acidity in the vinegar and would make it go off if not refigerated.
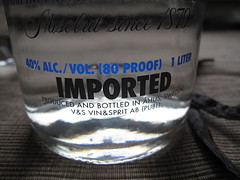
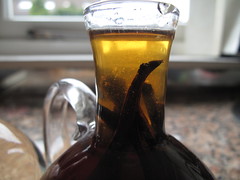
Vanilla extract: Making homemade Vanilla extract is one of the easiest things, ever. All you need is some alcohol with at least 35% alcohol by volume…. preferably plain and unflavoured alcohol so the vanilla gets a chance to shine through. You’ll also need a bottle with a cork/cover and some vanilla pods, then you’re set to go. Generally, I use about 3 beans in a 200ml bottle.
First of all, fill the bottle with some alcohol – I use 40% alcohol Vodka. Some like it with Rum….I just used Vodka ’cause that was what I found on offer at Sligro! Anyway, I split 3 beans and put them in the bottle. Please don’t be like me who got some nice fancy bottles which are extremely fragile. So far, I’ve broken about 3 or 4 of these bottles. Never again.
Put your Vanilla in the bottle, but the cork on, shake a bit and then keep it away to mature. In a cool, dark and dry place. Give it a shake a few times a week and it should be ready after about 6 weeks.
Personally, I wait as long as I can cause this extract improves with time, like fine wine. Anyhow, when it is ready, I just use at will. If you want to check the flavour of the extract, don’t just drink it as the alcohol overwhelms the vanilla taste. Instead, put a little in some milk which provides a good base for the flavours to develop.
When ever I use from my bottle of extract, I top it up with more vodka and occassionally toss in an extra pod. That’s it.

Vanilla tea: Cut up a vanilla pod with scissors and mix with tea leaves. Leave to ‘mature’ for a few weeks in an airtight container, set in a cool, dark place
Vanilla coffee: Blend dried pods with fresh coffee beans, or stick some dried pods in your jar of instant coffee
Vanilla syrup: Heat up about 300-400ml of maple syrup gently and add a couple of used vanilla pods. Slowly bring to the boil for about 30 seconds and take off the heat. When cool, pour in a bottle and store in the refigerator, pods and all
So enjoy your Vanilla beans and if you have any Vanilla recipes to share… you’re more than welcome.
Did you enjoy this? See other how-tos!